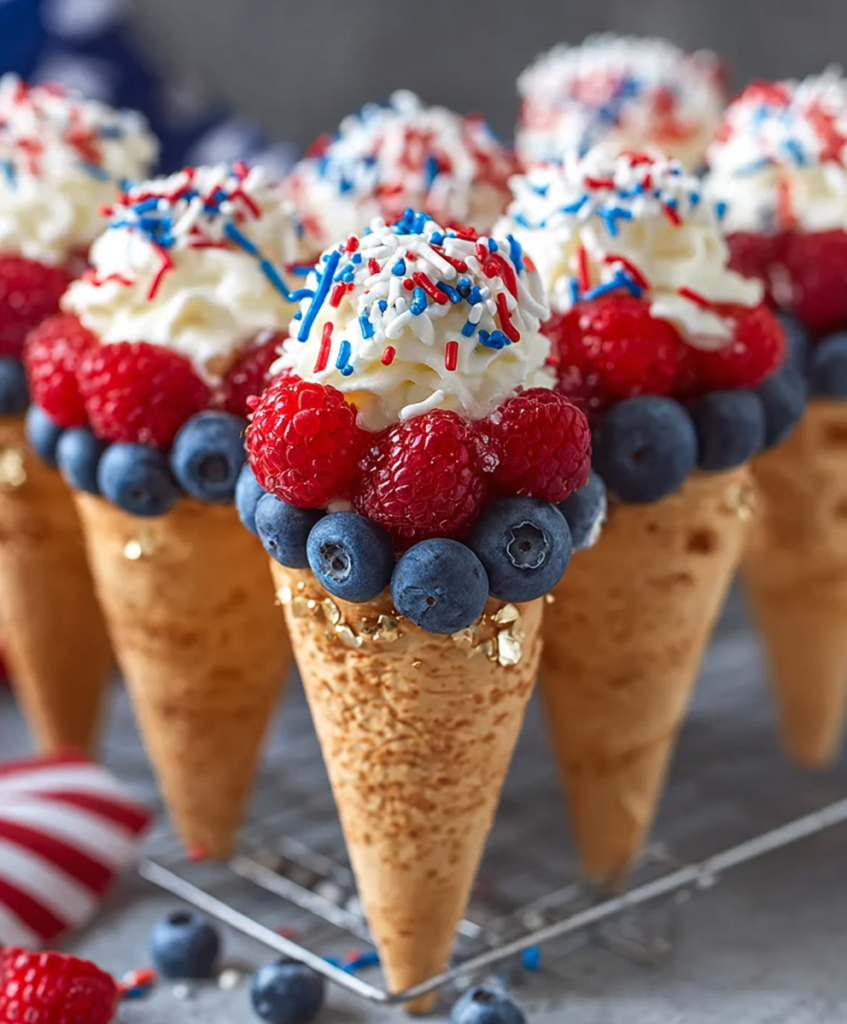
These Easy Patriotic Fruit Cones are a fun, no-bake dessert featuring crispy waffle cones dipped in white chocolate, topped with red and blue sprinkles, and filled with creamy yogurt and fresh berries. These Patriotic Fruit Cones are perfect for summer celebrations, Fourth of July parties, picnics, BBQs, and family gatherings because they are light, refreshing, colorful, and incredibly simple to assemble. Every bite of these Patriotic Fruit Cones delivers a satisfying crunch from the cone, creamy yogurt layers, and bursts of juicy strawberries, raspberries, and blueberries. If you’re searching for an easy patriotic dessert, no-bake fruit treat, or kid-friendly summer recipe, these Patriotic Fruit Cones are a festive showstopper that looks impressive but comes together in minutes.
Introduction
When it comes to festive desserts that are both beautiful and easy to prepare, these Patriotic Fruit Cones truly shine. They bring together the refreshing sweetness of fresh fruit, the creamy smoothness of yogurt, and the delicate crunch of waffle cones—all wrapped in a red, white, and blue theme that’s perfect for summer celebrations.
What makes these cones so special is their simplicity. There’s no baking involved, no complicated steps, and no long preparation time. Instead, you get a quick assembly-style dessert that feels playful, colorful, and satisfying. The white chocolate-dipped cone tops add a sweet crunch, while the sprinkles bring a festive pop of color that makes these cones stand out on any dessert table.
These Patriotic Fruit Cones are ideal for warm-weather gatherings like Independence Day parties, backyard barbecues, and picnics. They’re also a great option for kids’ parties or anytime you want a lighter dessert that still feels fun and indulgent. Each cone is customizable, making them as versatile as they are visually appealing.
Why You’ll Love This Recipe
- No-bake dessert perfect for hot weather
- Quick and easy assembly in under 30 minutes
- Fresh, fruity, and naturally sweet flavor
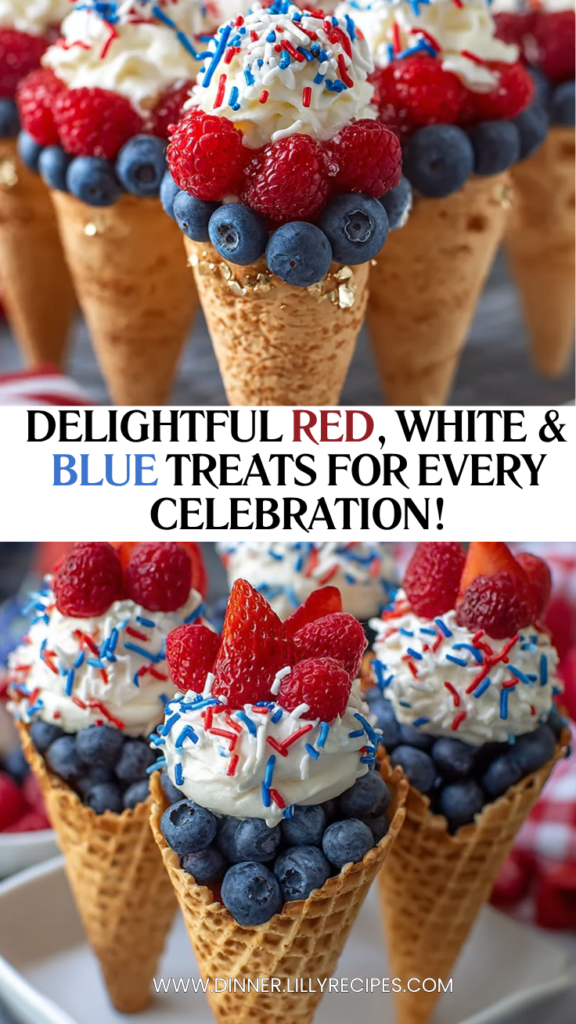
- Fun and festive red, white, and blue presentation
- Kid-friendly and great for parties
- Customizable with your favorite fruits
Ingredients Breakdown
Cone Coating
- 1 cup white chocolate melting wafers or chips
- 6 waffle cones
- ¼ cup red and blue sugar sprinkles
- 6 vanilla pirouette cream-filled wafers
Filling
- 2 cups white yogurt (unflavored or vanilla)
- 1 cup raspberries
- 1 cup blueberries
- 1 cup small strawberries
Serving Size
Makes 6 fruit cones
Ingredient Notes
White chocolate melting wafers create a smooth, sweet coating that helps the sprinkles stick and adds a decorative finish.
Waffle cones provide a crunchy, edible base that holds all the creamy and fruity layers.
Yogurt adds creaminess and balances the sweetness of the fruit and chocolate coating.
Raspberries, blueberries, and strawberries bring fresh, natural sweetness and the signature patriotic red and blue colors.
Pirouette wafers add an optional elegant crunch and decorative touch.
Tools & Equipment Needed
- Heat-safe bowl
- Microwave or double boiler
- Spoon or spatula
- Baking sheet or upright cone holders (cups or bowls)
- Small plate for sprinkles
- Refrigerator space for chilling
Step-by-Step Instructions
1. Melt the White Chocolate
Place 1 cup of white chocolate melting wafers or chips into a heat-safe bowl.
Melt according to package instructions until smooth and creamy, stirring until fully melted.
2. Dip the Waffle Cones
Dip the top of each waffle cone into the melted white chocolate, coating about 1 inch down.
Allow excess chocolate to drip back into the bowl for a smooth finish.
3. Add the Sprinkles
Immediately sprinkle ¼ cup red and blue sugar sprinkles over the chocolate-coated area.
Do this over a plate to catch any excess sprinkles.
4. Let the Cones Set
Place the decorated cones upright in cups or bowls to hold their shape.
Refrigerate for 10 minutes, or until the white chocolate hardens completely.
This step ensures the structure of your Patriotic Fruit Cones stays intact.
5. Prepare the Filling
Once the cones are set, gather:
- 2 cups white yogurt
- 1 cup raspberries
- 1 cup blueberries
- 1 cup small strawberries
Make sure the fruit is washed and dried to prevent excess moisture.
6. Assemble the Cones
Layer yogurt and fruit inside each cone.
Start with a spoonful of yogurt, followed by a mix of berries, and repeat until the cone is filled.
Finish with a colorful layer of fruit on top.
7. Add Final Touches
If desired, place a vanilla pirouette wafer into each cone for decoration and extra crunch.
Serve immediately or keep chilled.
Tips & Variations
Yogurt Options
- Vanilla yogurt for a sweeter flavor
- Plain yogurt for a lighter, tangier taste
- Greek yogurt for extra protein and thickness
Fruit Variations
- Blackberries can replace raspberries for deeper flavor
- Chopped cherries can be used for a sweeter red option
- Sliced kiwi can be added for extra freshness
Dairy-Free Option
Use plant-based yogurt and dairy-free white chocolate alternatives.
Extra Sweetness
Drizzle a small amount of honey inside the cones before adding yogurt.
Crunch Boost
Add granola layers for extra texture contrast.
Flavor Profile
These Patriotic Fruit Cones are light, refreshing, and naturally sweet. The creamy yogurt provides a smooth, tangy base that pairs beautifully with the juicy burst of fresh berries. The waffle cone adds a crisp, crunchy contrast, while the white chocolate coating introduces a subtle sweetness and creamy vanilla-like flavor.
Each bite is a mix of creamy, crunchy, and juicy textures, making this dessert both refreshing and satisfying without feeling heavy.
Nutritional Overview
Estimated per cone:
- Calories: 210
- Protein: 3g
- Carbohydrates: 32g
- Fat: 8g
- Fiber: 3g
Dietary notes: vegetarian-friendly; can be made dairy-free with substitutions.
Make-Ahead & Meal Prep Tips
These cones are best assembled close to serving time to maintain cone crispness.
Prep Ahead
- Wash and dry fruit in advance
- Melt and decorate cones earlier in the day
- Store yogurt chilled separately
Storage
Assembled cones should be eaten shortly after filling to prevent sogginess.
Refrigeration
Keep decorated cones chilled before assembly for best texture.
FAQs
Can I make these ahead of time?
You can prepare the cones and fruit ahead, but assemble just before serving.
How do I keep cones from getting soggy?
Avoid filling too early and ensure fruit is dry before layering.
Can I use frozen fruit?
Fresh fruit is recommended for best texture, but thawed fruit can be used if drained well.
What yogurt works best?
Vanilla yogurt is ideal for sweetness, but Greek yogurt works well for a thicker texture.
Can kids help make these?
Yes, this is a great kid-friendly recipe for assembly and decoration.
Cooking Timeline
| Step | Time |
|---|---|
| Prep Time | 15 minutes |
| Cook Time | 10 minutes |
| Total Time | 25 minutes |
| Servings | 6 |
Serving Suggestions
Serve these Patriotic Fruit Cones upright in small cups or mason jars for stability and presentation. They look especially beautiful arranged on a platter with extra berries scattered around for decoration.
For parties, place them in a decorative tray lined with parchment paper or colorful napkins for a festive touch.
Recipe Variations
Yogurt Parfait Cones
Layer extra yogurt for a creamier, dessert-style cone.
Crunchy Granola Cones
Add granola between layers for a breakfast-inspired version.
Chocolate Berry Cones
Drizzle melted chocolate inside the cone for extra indulgence.
Frozen Yogurt Cones
Freeze assembled cones for a refreshing ice cream-style treat.
Ingredient Spotlight
White Chocolate
White chocolate adds sweetness and structure to the cone tops. When melted and hardened, it creates a decorative shell that helps hold sprinkles and enhances presentation.
Fresh Berries
Strawberries, blueberries, and raspberries provide natural sweetness, vibrant color, and refreshing flavor that define the patriotic theme of this dessert.
Pro Cooking Tips
- Dry fruit thoroughly to prevent soggy cones
- Dip cones evenly for a clean, professional look
- Work quickly when adding sprinkles before chocolate sets
- Use cold yogurt for better layering control
- Chill cones properly before filling
Storage & Freezing Guide
Refrigerator
Store decorated cones before filling for up to 24 hours.
After Filling
Best eaten immediately after assembly.
Freezing
Not recommended once assembled, as texture will soften.
Nutrition Estimate Table (Per Cone)
| Nutrient | Amount |
|---|---|
| Calories | 210 |
| Protein | 3g |
| Carbs | 32g |
| Fat | 8g |
| Fiber | 3g |
Dietary notes: vegetarian, adaptable for dairy-free diets, kid-friendly, no-bake dessert.
Expanded Conclusion
These Easy Patriotic Fruit Cones are the perfect blend of fun, freshness, and festive color. With creamy yogurt, juicy berries, crunchy waffle cones, and a sweet white chocolate coating, they offer a light yet satisfying dessert that fits beautifully into any summer celebration.
Whether you’re hosting a Fourth of July party, planning a picnic, or simply looking for a quick no-bake treat, these Patriotic Fruit Cones deliver both visual appeal and delicious flavor with minimal effort. They’re customizable, kid-friendly, and guaranteed to brighten any dessert table.
Save this recipe for your next celebration and enjoy a dessert that’s as joyful to make as it is to eat.
PrintEasy Patriotic Fruit Cones – Festive No-Bake Red White & Blue Dessert

Patriotic Fruit Cones are festive and delightful treats perfect for celebrations, combining fresh fruits, yogurt, and a sweet chocolate touch.
- Prep Time: 15 minutes
- Cook Time: 10 minutes
- Total Time: 25 minutes
- Yield: 6 servings 1x
- Category: Dessert
- Method: No-Bake
- Cuisine: American
- Diet: Vegetarian
Ingredients
- 1 cup white chocolate melting wafers or chips
- 6 waffle cones
- 1/4 cup red and blue sugar sprinkles
- 6 vanilla pirouette cream-filled wafers
- 2 cups white yogurt (unflavored or vanilla)
- 1 cup raspberries
- 1 cup blueberries
- 1 cup small strawberries
Instructions
- Melt white chocolate in a heat-safe bowl according to package directions.
- Dip the top of each cone into the white chocolate about 1 inch down.
- Let excess chocolate drip off.
- Immediately sprinkle with red and blue sprinkles.
- Place cones upright in cups or bowls to hold shape.
- Refrigerate 10 minutes until chocolate sets.
- Layer yogurt and fruit inside cones, finishing with fruit on top.
- Serve chilled.
Notes
- Use heat-safe bowls for melting chocolate.
- Let chocolate fully harden before filling cones.
- Mix fruits as desired.
Nutrition
- Serving Size: 1 cone
- Calories: 210
- Sugar: 22 g
- Sodium: 50 mg
- Fat: 8 g
- Saturated Fat: 5 g
- Unsaturated Fat: 2 g
- Trans Fat: 0 g
- Carbohydrates: 32 g
- Fiber: 3 g
- Protein: 3 g
- Cholesterol: 10 mg