
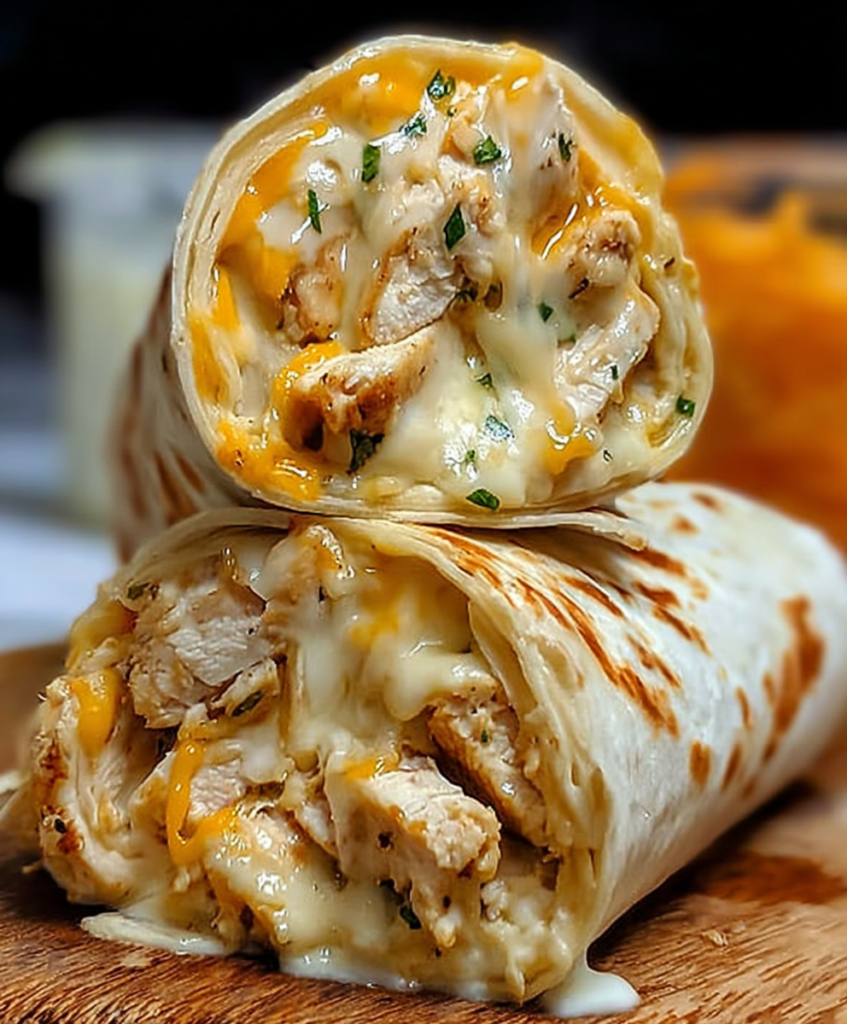
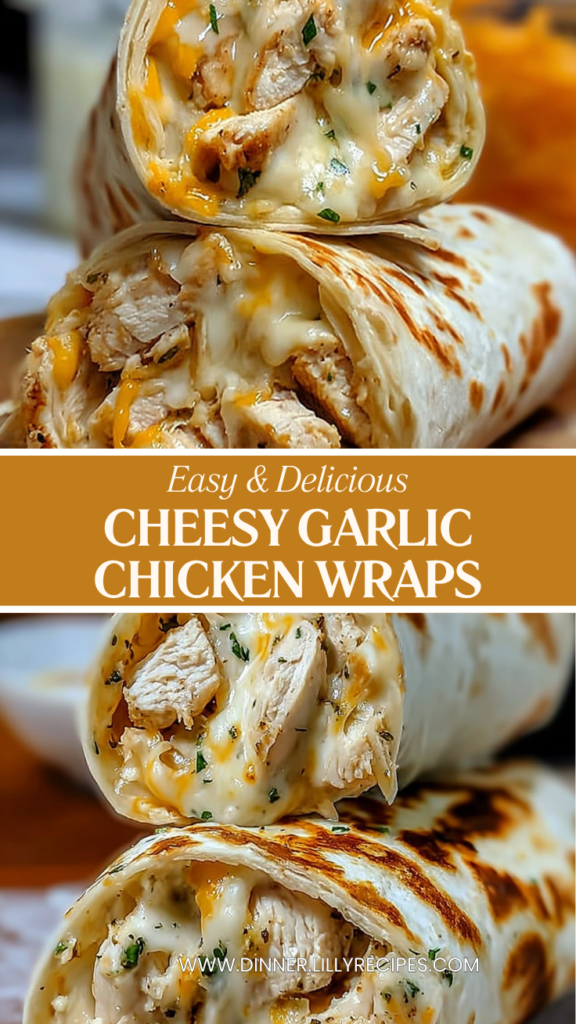
Easy Cheesy Garlic Chicken Wraps are a quick, flavorful, and satisfying dinner made with tender seasoned chicken, creamy garlic sauce, and melted cheddar and mozzarella cheese all wrapped inside a warm tortilla and pan-toasted until golden and crispy. This simple chicken wrap recipe is perfect for busy weeknights, meal prep, or easy family dinners when you want something fast, comforting, and packed with flavor. The garlic-seasoned chicken cooks in minutes, then gets layered with creamy sauce and cheese before being toasted into a crispy, gooey wrap that’s rich, savory, and incredibly satisfying. If you love easy chicken dinners, cheesy garlic recipes, or quick skillet meals, these Cheesy Garlic Chicken Wraps are a reliable go-to that delivers big flavor in just 30 minutes.
Introduction
Some recipes are all about convenience, but the best ones manage to be both quick and incredibly delicious at the same time. These Cheesy Garlic Chicken Wraps are exactly that kind of meal. They come together in about half an hour, require simple ingredients, and deliver a bold, cheesy, garlic-packed flavor that feels like comfort food in every bite.
What makes this recipe so appealing is the combination of textures and flavors. The chicken is seasoned with garlic powder, onion powder, and paprika, giving it a savory, slightly smoky taste. Once cooked, it’s tucked into soft tortillas along with creamy garlic sauce and a generous layer of melted cheddar and mozzarella cheese.
When the wraps are toasted in a skillet, the outside becomes golden and slightly crisp while the inside turns gooey, creamy, and packed with flavor. The result is a satisfying balance of crunchy exterior and melty, cheesy filling that works perfectly for both dinner and meal prep.
Whether you’re cooking for a family, preparing quick lunches, or just need something fast and comforting, these Cheesy Garlic Chicken Wraps are an easy recipe you’ll find yourself making again and again.
Why You’ll Love This Recipe
- Ready in just 30 minutes from start to finish
- Crispy outside with a creamy, cheesy filling
- Simple pantry ingredients with bold flavor
- Perfect for quick dinners or meal prep lunches
- Easy skillet or air fryer method
- Family-friendly and customizable
Ingredients Breakdown
Servings: 4 wraps
- 2 large chicken breasts, diced
The main protein, cooking quickly and absorbing seasoning well. - 1 tbsp olive oil
Helps coat the chicken and ensures even browning. - 2 tsp garlic powder
Adds strong garlic flavor throughout the chicken. - 1 tsp onion powder
Enhances savory depth and balance. - 1 tsp paprika
Adds mild smokiness and color. - Salt and pepper, to taste
Enhances overall seasoning. - 1 cup shredded cheddar cheese
Provides sharp, creamy meltiness. - 1/2 cup shredded mozzarella cheese
Adds stretchy, gooey texture when melted. - 4 large flour tortillas
The soft wrap base that holds everything together. - 1/2 cup creamy garlic sauce (store-bought or homemade)
Adds rich, tangy garlic flavor and creaminess. - Fresh parsley, chopped (optional, for garnish)
Adds freshness and color before serving.
Tools & Equipment Needed
Essential Equipment
- Large mixing bowl
- Non-stick skillet
- Spatula or tongs
- Knife and cutting board
- Measuring spoons
- Plate for assembling wraps
Optional Helpful Tools
- Air fryer (for crispier wraps)
- Cheese grater for fresh cheese
- Toothpicks to hold wraps closed
Step-by-Step Instructions
1. Season the Chicken
In a large bowl, combine diced chicken with olive oil, garlic powder, onion powder, paprika, salt, and pepper. Mix until the chicken is evenly coated with seasoning.
2. Cook the Chicken
Heat a non-stick skillet over medium heat. Add the seasoned chicken and cook for 6–8 minutes, stirring occasionally, until browned and fully cooked. Remove from heat and set aside.
3. Prepare the Tortillas
Lay tortillas flat on a clean surface. Spread about 1 tablespoon of creamy garlic sauce evenly over each tortilla.
4. Assemble the Wraps
Top each tortilla with cooked chicken, then sprinkle evenly with cheddar and mozzarella cheese.
5. Fold the Wraps
Fold the tortillas tightly into wrap shape, sealing in the filling.
6. Toast in Skillet
Place wraps back into the skillet over medium heat. Cook for 2–3 minutes per side until golden brown and crispy, and the cheese is fully melted.
7. Serve
Slice wraps in half and garnish with fresh parsley if desired. Serve immediately while warm and cheesy.
Tips & Variations
Protein Options
- Swap chicken with turkey or shredded rotisserie chicken
- Use grilled shrimp for a seafood version
Vegetarian Option
- Replace chicken with grilled vegetables or plant-based protein
Spice Level Adjustments
- Add red pepper flakes or hot sauce to the garlic sauce
- Use spicy paprika for extra heat
Cheese Variations
- Pepper Jack for spicy flavor
- Monterey Jack for mild creaminess
Healthier Version
- Use whole wheat tortillas
- Choose low-fat cheese
- Reduce oil slightly during cooking
Air Fryer Method
Cook wrapped tortillas at 375°F for 4–5 minutes per side until golden and crispy.
Flavor Profile
Cheesy Garlic Chicken Wraps are savory, rich, and deeply satisfying with a strong garlic-forward flavor. The seasoned chicken brings smoky, slightly spiced notes from paprika and garlic powder, while the creamy garlic sauce adds tangy richness that enhances every bite.
The melted cheddar and mozzarella combine to create a creamy, stretchy filling that contrasts beautifully with the crispy toasted tortilla exterior. The result is a wrap that is crunchy on the outside, soft and gooey on the inside, and packed with bold garlic-cheese flavor throughout.
Each bite delivers a comforting balance of creamy sauce, seasoned chicken, and melted cheese.
Nutritional Overview
Estimated Per Serving (1 wrap)
- Calories: 420 kcal
- Protein: 34g
- Carbohydrates: 28g
- Fat: 20g
- Fiber: 2g
Dietary Notes
- High-protein meal
- Can be adapted for lower fat diets
- Family-friendly
- Easily customizable
Make-Ahead & Meal Prep Tips
Prep Ahead
- Cook and season chicken in advance
- Pre-shred cheese for faster assembly
- Prepare garlic sauce ahead of time
Storage Instructions
Store cooked chicken separately in an airtight container in the refrigerator for up to 3 days.
Reheating Tips
Reheat chicken in a skillet or microwave before assembling wraps for best texture.
Best Freshness Tip
Assemble and toast wraps just before serving for maximum crispiness.
FAQs
Can I use rotisserie chicken?
Yes, it works well and saves time.
Can I make these ahead of time?
You can prep the filling ahead, but assemble and toast fresh for best results.
Can I bake these instead of pan-frying?
Yes, bake at 375°F until golden and crispy.
What tortillas work best?
Large flour tortillas hold the filling best and crisp nicely.
Can I make them spicy?
Yes, add hot sauce, chili flakes, or spicy seasoning to the chicken.
Can I freeze them?
It’s best to freeze the cooked chicken filling rather than assembled wraps.
Cooking Timeline
| Task | Time |
|---|---|
| Prep Time | 10 minutes |
| Cook Time | 20 minutes |
| Total Time | 30 minutes |
| Servings | 4 wraps |
Serving Suggestions
Serve Cheesy Garlic Chicken Wraps hot and fresh off the skillet for the best texture and flavor. Slice diagonally to showcase the cheesy filling and juicy chicken inside.
For extra flavor, drizzle a little more creamy garlic sauce on top or serve with a simple side salad or roasted vegetables.
These wraps are perfect for:
- Quick weeknight dinners
- Meal prep lunches
- Easy family meals
- On-the-go meals
- Comfort food cravings
Recipe Variations
Spicy Garlic Chicken Wraps
Add chili flakes or hot sauce for heat.
Extra Cheesy Wraps
Increase cheese for a richer, gooier filling.
Low-Carb Version
Use low-carb tortillas for a lighter option.
Veggie Loaded Wraps
Add sautéed peppers, onions, or spinach.
Ingredient Spotlight
Creamy Garlic Sauce
The garlic sauce is the flavor backbone of this recipe. It adds richness, tanginess, and deep garlic flavor that ties everything together and enhances both the chicken and cheese.
Chicken Breast
Chicken breast is ideal for this recipe because it cooks quickly, absorbs seasoning well, and stays tender when not overcooked.
Pro Cooking Tips
Don’t Overcook Chicken
Cook just until done to keep it juicy inside the wrap.
Use Medium Heat for Toasting
This ensures the tortilla crisps without burning.
Spread Sauce Evenly
Even distribution ensures balanced flavor in every bite.
Press Wraps Lightly While Cooking
Helps achieve even browning and crisp texture.
Use Freshly Shredded Cheese
It melts more smoothly and improves texture.
Storage & Freezing Guide
Refrigerator Storage
Store cooked chicken filling for up to 3 days.
Freezer Storage
Freeze chicken filling for up to 2 months.
Reheating Instructions
- Stovetop: Reheat chicken before assembling
- Microwave: Warm in short intervals
Best Freezing Tip
Cool completely before freezing for best results.
Nutrition Estimate Table (Per Serving)
| Nutrient | Amount |
|---|---|
| Calories | 420 kcal |
| Protein | 34g |
| Carbs | 28g |
| Fat | 20g |
| Fiber | 2g |
Dietary Notes
- High-protein
- Family-friendly
- Meal-prep friendly
- Customizable
Expanded Conclusion
Cheesy Garlic Chicken Wraps are the kind of recipe that proves simple ingredients can create something truly delicious and satisfying. With seasoned chicken, creamy garlic sauce, and melted cheese all wrapped in a golden toasted tortilla, this dish delivers comfort, flavor, and convenience in every bite.
What makes this recipe especially valuable is how quickly it comes together without sacrificing taste. In just 30 minutes, you get a crispy, cheesy, garlic-infused meal that works perfectly for busy weeknights, lunch prep, or casual dinners with family.
The combination of creamy filling and crispy exterior makes every bite exciting, while the flexibility of the recipe allows you to adjust spice levels, add vegetables, or change proteins easily.
Save this Cheesy Garlic Chicken Wraps recipe for those days when you want something fast, flavorful, and deeply satisfying—it’s a dependable favorite you’ll want to make again and again.
PrintEasy Cheesy Garlic Chicken Wraps – Quick 30-Minute Family Dinner Recipe
These Cheesy Garlic Chicken Wraps are a quick and easy dinner packed with juicy seasoned chicken, creamy garlic sauce, and melted cheese wrapped in a golden tortilla. Perfect for busy weeknights, meal prep, or a lighter comfort food option.
- Prep Time: 10 minutes
- Cook Time: 20 minutes
- Total Time: 30 minutes
- Yield: 4 servings 1x
- Category: Dinner
- Method: Skillet
- Cuisine: American
- Diet: Low Fat
Ingredients
- 2 large chicken breasts, diced
- 1 tbsp olive oil
- 2 tsp garlic powder
- 1 tsp onion powder
- 1 tsp paprika
- Salt and pepper to taste
- 1 cup shredded cheddar cheese
- 1/2 cup shredded mozzarella cheese
- 4 large flour tortillas
- 1/2 cup creamy garlic sauce
- Fresh parsley (optional)
Instructions
- Mix chicken with olive oil, garlic powder, onion powder, paprika, salt, and pepper.
- Cook chicken in a skillet over medium heat for 6–8 minutes until fully cooked.
- Spread garlic sauce on each tortilla.
- Add chicken and top with both cheeses.
- Fold wraps and toast in skillet 2–3 minutes per side until golden and cheese melts.
- Slice and serve warm.
Notes
- Use freshly shredded cheese for better melt.
- Add hot sauce or chili flakes for spice.
- Whole wheat tortillas can make it lighter.
- Vegetarian option: replace chicken with grilled vegetables or plant-based protein.
- Air fryer option: 375°F for 4–5 minutes per side.
Nutrition
- Serving Size: 1 wrap
- Calories: 420
- Sugar: 2 g
- Sodium: 680 mg
- Fat: 20 g
- Saturated Fat: 9 g
- Unsaturated Fat: 9 g
- Trans Fat: 0 g
- Carbohydrates: 28 g
- Fiber: 2 g
- Protein: 34 g
- Cholesterol: 85 mg
Related posts:
 Easy Dump-and-Bake Chicken Tzatziki Casserole – Quick Mediterranean Family Dinner
 Easy Creamy One-Pot Beef and Potato Casserole – Cozy Family Dinner Recipe
 Best Garlic Parmesan Crockpot Chicken and Potatoes – Easy Slow Cooker Dinner Recipe
 Easy Better-Than-Takeout Cashew Chicken – Quick 20-Minute Family Dinner